This PCOS-Friendly Pão de Queijo (Brazilian Cheese Bread) is a PCOS-friendly recipe with 180 calories, 8g protein, and 15g carbs per serving. Ready in 35 minutes. High in fiber (2g), which supports insulin sensitivity.
Nutrition per Serving
Grocery List
- Tapioca flour (tapioca starch, manioc starch)
- Almond flour (blanched, finely ground)
- Coconut flour
- Sea salt
- Baking powder (aluminum-free)
- Whole milk or unsweetened almond milk
- Olive oil or avocado oil
- Eggs
- Parmesan cheese (finely grated)
- Mozzarella cheese (low-moisture, part-skim, shredded)
- Plain Greek yogurt (full-fat)
Glycemic Index Information
This PCOS-friendly pão de queijo offers improved glycemic control compared to traditional versions. Traditional pão de queijo made exclusively with tapioca starch has a moderate to high glycemic index (65-75) and contains 20-25 grams of carbohydrates per serving with minimal protein or fiber. This modified version contains only 15 grams of net carbohydrates by incorporating almond flour and coconut flour, which dilute the tapioca starch while adding nutrients. The addition of 8 grams of protein from cheese, egg, and Greek yogurt significantly slows carbohydrate absorption and reduces the overall glycemic load. The healthy fats from cheese and olive oil further blunt blood sugar response. While tapioca starch itself is high-glycemic, the complete recipe creates a balanced snack with moderate glycemic impact suitable for PCOS management when eaten in appropriate portions with adequate protein from other foods.
About Pão de Queijo
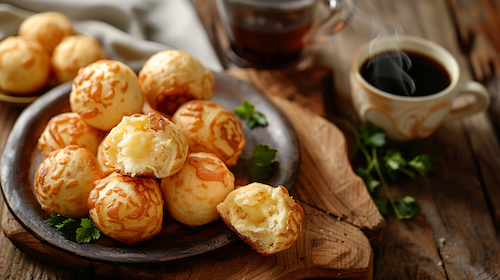
Pão de queijo is an iconic Brazilian snack originating from Minas Gerais, where it has been made for centuries. Traditional recipes use only tapioca starch, milk, oil, eggs, and cheese, creating naturally gluten-free rolls with a distinctive crispy-chewy texture and irresistible cheese flavor. The bread puffs during baking, creating a light, airy interior with a thin crispy crust. Pão de queijo is enjoyed throughout the day in Brazil as breakfast, snacks, or alongside meals. This PCOS-friendly version maintains the authentic texture and flavor while improving the nutritional profile through strategic ingredient additions.
Storage and Reheating
Pão de queijo is best enjoyed fresh and warm from the oven when the texture is optimal. Store cooled pão de queijo in an airtight container at room temperature for 1 day, or refrigerate for up to 3 days. The texture becomes denser when cold. Reheat in a 350°F (175°C) oven for 5-7 minutes to restore crispiness, or microwave for 15-20 seconds (though this makes them chewier rather than crispy). For longer storage, freeze unbaked dough balls on a baking sheet, then transfer to a freezer bag for up to 3 months. Bake directly from frozen, adding 3-5 minutes to the baking time. You can also freeze baked pão de queijo and reheat in the oven.
Ingredients
Instructions
-
Step-by-Step Instructions
-
Preheat your oven: Preheat the oven to 375°F (190°C). Line a baking sheet with parchment paper or a silicone baking mat. Lightly grease a mini muffin tin if you prefer the traditional dome shape, though a baking sheet works perfectly.
-
Heat the liquid mixture: In a small saucepan over medium heat, combine the milk and olive oil. Heat until the mixture just begins to simmer and small bubbles form around the edges. Do not boil. This step is crucial for creating the right texture. Remove from heat immediately.
-
Combine the dry ingredients: In a large mixing bowl, whisk together the tapioca flour, almond flour, coconut flour, sea salt, and baking powder until thoroughly combined with no lumps.
-
Create the dough base: Pour the hot milk and oil mixture over the dry ingredients. Using a wooden spoon or spatula, stir vigorously until a thick, sticky paste forms. The heat from the liquid partially cooks the starches, creating the characteristic chewy texture. Let this mixture cool for 2-3 minutes until warm but not hot.
-
Add the egg: Add the egg to the warm dough and mix vigorously until completely incorporated. The dough will become smoother and more elastic. Mix for about 30 seconds to ensure the egg is fully distributed.
-
Incorporate the cheese: Add the grated Parmesan, shredded mozzarella, and Greek yogurt to the dough. Mix thoroughly until the cheese is evenly distributed throughout. The dough will be thick, sticky, and stretchy, which is correct.
-
Rest the dough: Let the dough rest for 5 minutes. This allows the coconut flour to absorb moisture and makes the dough easier to handle. If the dough seems too thin, it will thicken during this resting period.
-
Shape the cheese breads: Lightly oil your hands to prevent sticking. Scoop about 1.5 tablespoons of dough and roll between your palms to form smooth balls about 1.5 inches (4cm) in diameter. The dough will be sticky but should hold its shape.
-
Arrange on baking sheet: Place the dough balls on the prepared baking sheet, spacing them about 2 inches (5cm) apart, or place each ball into a greased mini muffin cup. They will expand during baking but do not spread much.
-
Bake until golden: Bake for 18-22 minutes until the pão de queijo puffs up and the tops are golden brown with slightly darker spots. The exterior should feel firm when gently pressed. Traditional pão de queijo has a crispy exterior and chewy interior.
-
Cool slightly before serving: Remove from the oven and let cool on the baking sheet for 2-3 minutes. Pão de queijo is best enjoyed warm when the cheese is still gooey and the exterior is crispy. The texture becomes chewier as they cool.
-
Serve immediately: Serve warm for the best texture and flavor. The characteristic hollow interior develops as the bread cools slightly. These are perfect as a snack, breakfast item, or accompaniment to meals.
-
Pro Tip: The key to authentic pão de queijo texture is the hot liquid mixing with the starch. Do not skip this step or use cold liquid. For extra Brazilian flavor, add a pinch of garlic powder to the dough.
Why This PCOS-Friendly Pão de Queijo Supports Hormone Balance
Pão de queijo holds a special place in Brazilian cuisine as the quintessential comfort food that transcends all meals and occasions. From breakfast tables to afternoon coffee breaks to dinner accompaniments, these puffy cheese breads represent home, family, and Brazilian identity.
The traditional recipe is beautifully simple, using tapioca starch from cassava root, creating naturally gluten-free rolls that suit many dietary needs. However, the high starch content and lack of protein create challenges for women managing PCOS and insulin resistance.
This PCOS-friendly version honors the authentic flavor and texture Brazilians love while addressing the metabolic concerns that standard pão de queijo presents.
By incorporating almond flour and coconut flour to reduce the tapioca starch proportion, increasing the protein through strategic cheese selection and Greek yogurt, and using healthy fats, this recipe creates cheese bread that supports rather than sabotages blood sugar balance.
Key Nutritional Benefits for PCOS Management
Reduced Carbohydrate Load with Added Nutrients
Traditional pão de queijo contains 20-25 grams of rapidly-digesting carbohydrates per serving from tapioca starch alone, with minimal fiber or additional nutrients. This PCOS-friendly version contains 15 grams of net carbohydrates, representing a 25-40% reduction in glycemic load.
The incorporation of almond flour and coconut flour not only reduces carbohydrate density but adds fiber, healthy fats, vitamin E, and magnesium that pure tapioca starch lacks. This creates a more nutrient-dense snack that provides sustenance beyond empty calories.
Significantly Increased Protein Content
With 8 grams of protein per serving, this pão de queijo provides nearly double the protein of traditional versions (4-5 grams). The protein comes from Parmesan cheese, mozzarella, eggs, and Greek yogurt, offering complete amino acid profiles.
Adequate protein dramatically improves the blood sugar response to carbohydrates by slowing digestion and absorption. Protein also increases satiety hormones, helping you feel satisfied for hours after eating.
For women with PCOS, the improved protein-to-carbohydrate ratio (approximately 1:2) is far superior to traditional versions (1:5), supporting better insulin sensitivity and reduced cravings.
Calcium and Vitamin D for Metabolic Health
This recipe provides approximately 200mg of calcium per serving (about 20% of daily needs) from the Parmesan, mozzarella, and milk. Calcium plays important roles in PCOS management.
Research shows adequate calcium intake improves insulin sensitivity, supports bone health (important as PCOS increases fracture risk), and may help regulate menstrual cycles. The combination with vitamin D from eggs and fortified dairy enhances calcium absorption.
Some studies suggest calcium and vitamin D together improve metabolic outcomes in women with PCOS.
Healthy Fats for Hormone Production and Satiety
The 10 grams of fat per serving come from cheese, egg, olive oil, and almond flour. These fats are predominantly monounsaturated and saturated fats from whole food sources, essential for producing steroid hormones including estrogen, progesterone, and testosterone.
The fat content dramatically slows carbohydrate absorption, preventing blood sugar spikes. Fat also provides satiety, helping these small cheese breads feel satisfying despite their modest size.
The combination of protein and fat makes this snack metabolically superior to high-carb, low-fat alternatives.
Naturally Gluten-Free for Sensitive Individuals
Like traditional pão de queijo, this version is naturally gluten-free, making it suitable for women with celiac disease or gluten sensitivity. Some women with PCOS report feeling better when reducing gluten intake, potentially due to reduced inflammation.
While not everyone with PCOS needs to avoid gluten, having delicious gluten-free options expands food choices and allows for experimentation to determine individual responses.
Probiotic Benefits from Aged Cheese
Parmesan and aged cheeses contain beneficial bacteria that support gut health. The fermentation process that creates these cheeses also makes them easier to digest than fresh cheeses or milk.
A healthy gut microbiome influences insulin sensitivity, inflammation, and hormone metabolism, all crucial for PCOS management. The probiotics in aged cheese contribute to overall gut health alongside other fermented foods.
Potential Concerns and Modifications
Moderate Carbohydrate Content Requires Pairing
With 15 grams of net carbohydrates per serving (6 pieces), this snack contains moderate carbs that work best when paired with additional protein or eaten as part of a balanced meal.
Eating pão de queijo alone on an empty stomach may cause a more pronounced blood sugar rise than eating them alongside eggs, meat, or vegetables. For optimal PCOS management, enjoy these cheese breads as part of complete meals or snacks that include extra protein and healthy fats.
Tapioca Starch Considerations
Tapioca starch is essential for authentic pão de queijo texture but provides primarily carbohydrates with minimal nutrients. While this recipe reduces the tapioca proportion significantly, it still forms the base of the bread.
Women following very low-carb or ketogenic approaches for PCOS may find even this modified version too high in carbohydrates. Consider your individual carbohydrate tolerance and how these fit within your daily targets.
Dairy Sensitivity
This recipe contains multiple dairy products (cheese, milk, yogurt), which some women with PCOS find inflammatory. Dairy affects individuals differently based on lactose intolerance, casein sensitivity, or individual hormonal responses.
The aged Parmesan cheese is often better tolerated than fresh dairy due to lower lactose and pre-digested proteins.
If dairy worsens your PCOS symptoms, this recipe may not be suitable, though you could experiment with dairy-free milk and omit the yogurt, keeping only the cheese which some people tolerate better.
Portion Control Matters
At 180 calories per serving (6 pieces), these cheese breads are moderately calorie-dense. Their small size and delicious flavor make it easy to overeat.
Stick to the recommended portion size and ensure you are including them as part of balanced meals rather than mindlessly snacking throughout the day. The protein and fat content provides good satiety, so the recommended portion should feel satisfying when eaten mindfully.
Sodium Content
With 320mg of sodium per serving, primarily from the Parmesan cheese, this recipe provides moderate sodium. If you are managing blood pressure or need to limit sodium, choose low-sodium cheese varieties or reduce the salt slightly.
For most women with PCOS who do not have hypertension, this sodium level is reasonable within a whole-foods-based diet.
How to Serve PCOS-Friendly Pão de Queijo
In Brazil, pão de queijo accompanies virtually any meal and appears at all times of day. Serve warm pão de queijo for breakfast alongside scrambled eggs, sliced avocado, and fresh tomatoes for a balanced, Brazilian-inspired meal.
Enjoy them with afternoon coffee or tea as a satisfying snack that prevents energy crashes. Pair with Brazilian black bean soup, grilled meats, or a salad for lunch or dinner.
These cheese breads work beautifully as appetizers before meals or as party snacks. Their small size makes them perfect for portion control while their impressive appearance and flavor satisfy guests.
The cheese bread also pairs well with Brazilian churrasco (grilled meats), acting as a vehicle for chimichurri sauce or simply enjoyed alongside perfectly grilled proteins.
For optimal blood sugar management, always include adequate protein alongside pão de queijo. Six pieces of cheese bread with two eggs and vegetables for breakfast creates a balanced meal.
As a snack, pair six pieces with a handful of nuts or a serving of Greek yogurt to add extra protein and fat that further stabilizes blood sugar.
Cultural Significance and Food Connection
Pão de queijo represents more than just food in Brazilian culture. It embodies hospitality, home, and Brazilian identity. The smell of fresh pão de queijo signals welcome and comfort.
For Brazilians and those connected to Brazilian culture, these cheese breads carry memories of family gatherings, bakery visits, and daily rituals. Managing PCOS should not require abandoning these cultural connections.
This recipe demonstrates that traditional foods can be thoughtfully modified to support health while maintaining the flavors, textures, and emotional significance that make them meaningful.
When you can enjoy pão de queijo while managing PCOS, you avoid the deprivation and disconnection that often lead to dietary abandonment. Food is more than nutrition; it carries culture, memory, and identity worth preserving.
Research Methodology and Nutritional Science
This recipe is designed based on current research regarding PCOS management, insulin resistance, and balanced macronutrient approaches.
Evidence consistently shows that moderating carbohydrate intake while increasing protein and healthy fats improves insulin sensitivity and hormonal outcomes in women with PCOS.
The National Institute of Diabetes and Digestive and Kidney Diseases provides comprehensive information on insulin resistance and evidence-based dietary strategies.
Information on PCOS and nutrition comes from the National Institute of Child Health and Human Development, which conducts research on Polycystic Ovary Syndrome and management approaches.
Nutritional data is based on USDA FoodData Central and verified through multiple databases. Glycemic index information comes from published research on tapioca starch and strategies for reducing glycemic load through ingredient combinations.
The Office of Dietary Supplements provides evidence-based information on calcium, vitamin D, magnesium, and other micronutrients in this recipe and their roles in metabolic health.
Frequently Asked Questions
Can I make pão de queijo with only tapioca flour for authentic texture?
You can make traditional pão de queijo with only tapioca flour for the most authentic texture, but this creates a higher-carbohydrate snack with less favorable blood sugar impact for PCOS.
Pure tapioca flour versions contain 20-25 grams of carbs per serving with minimal protein or nutrients beyond the cheese.
This PCOS-friendly version intentionally reduces tapioca flour proportion by incorporating almond and coconut flour, lowering carbohydrates by 25-40% while adding fiber, protein, healthy fats, vitamin E, and magnesium.
The texture differs slightly, becoming slightly denser and less dramatically puffy, but remains delicious with the characteristic crispy exterior and chewy interior. If you prioritize authentic texture over blood sugar management, use traditional recipes.
If managing PCOS is your priority, the modified version provides better metabolic outcomes while still delivering satisfying Brazilian cheese bread.
Why do I need to heat the milk and oil before mixing with the flour?
Heating the milk and oil before mixing is crucial for authentic pão de queijo texture. The hot liquid partially cooks the starches in the tapioca flour through a process called gelatinization.
This creates the characteristic stretchy, elastic dough that results in the puffy, chewy texture pão de queijo is known for.
When you skip this step and use cold liquid, the starches do not gelatinize properly, resulting in dense, heavy bread that does not puff during baking and lacks the chewy interior. The hot liquid essentially starts the cooking process before baking, transforming the starch structure.
This technique is traditional in Brazilian pão de queijo making and essential for achieving proper texture. Always heat the liquid until small bubbles form around the edges, then pour immediately over the dry ingredients and mix vigorously while hot.
Can I make this pão de queijo dairy-free for PCOS?
Making truly authentic pão de queijo without dairy is extremely challenging because cheese defines the flavor and contributes to the texture. However, if dairy worsens your PCOS symptoms, you can experiment with modifications.
Replace the milk with unsweetened almond milk or coconut milk (full-fat for better texture). Replace the Parmesan with nutritional yeast (about 3-4 tablespoons) plus a pinch of salt for cheese-like flavor, though the texture will differ significantly.
Use dairy-free shredded cheese made from nuts or coconut, and omit the Greek yogurt or replace with thick coconut yogurt. The result will taste different from traditional pão de queijo but can still be delicious.
Keep in mind that removing dairy eliminates the calcium and probiotic benefits, so ensure you get these nutrients elsewhere. Many women with PCOS tolerate aged cheese like Parmesan better than fresh dairy, so you might try keeping the cheese while using dairy-free milk as a compromise.
How many pão de queijo can I eat with PCOS?
One serving of this PCOS-friendly recipe is 6 pieces, providing 15 grams of net carbohydrates, 8 grams of protein, and 180 calories. This portion works well as part of a balanced meal or substantial snack. For breakfast, 6 pieces alongside eggs and vegetables creates appropriate balance.
As a snack, 6 pieces with additional protein like nuts or Greek yogurt supports blood sugar stability. Your individual carbohydrate tolerance determines the best portion for you.
Women following lower-carb approaches (under 100g carbs daily) should account for these 15 grams within their daily targets. Women on moderate-carb plans (100-150g daily) have more flexibility. The key is not eating unlimited amounts just because they are PCOS-friendly.
The protein and fat content means 6 pieces should provide good satiety. If you find yourself wanting to eat far more than one serving, examine whether you are truly hungry or eating for other reasons, and ensure you are pairing the cheese bread with adequate protein from other sources.
Will this pão de queijo help me lose weight with PCOS?
No single food causes weight loss, but this pão de queijo can support weight management as part of a comprehensive PCOS-friendly eating pattern. The benefits come from several factors.
The reduced carbohydrate load (15g versus 20-25g in traditional versions) creates less insulin release, and lower insulin supports fat burning rather than fat storage. The increased protein (8g versus 4-5g) enhances satiety and supports muscle maintenance during weight loss.
The fiber from almond and coconut flour slows digestion and increases fullness. Together, these factors mean the cheese bread satisfies you without triggering the blood sugar rollercoaster that leads to cravings and overeating. However, at 180 calories per serving, portion control still matters.
Weight management requires overall calorie awareness, regular movement, stress management, adequate sleep, and consistent healthy food choices.
This pão de queijo is one helpful tool that allows you to enjoy Brazilian food culture while supporting your health goals, but it works best as part of a holistic approach to PCOS management.
Myths and Misconceptions About Tapioca Flour and PCOS
Myth: Tapioca flour is a healthy, low-glycemic flour for PCOS
Truth: Tapioca flour is pure starch with a high glycemic index (65-75) and no fiber, protein, or significant nutrients. It requires pairing with protein, fat, and lower-glycemic flours to moderate its blood sugar impact.
Tapioca flour alone is high-glycemic. Strategic combinations with protein and other flours improve its PCOS-friendliness. Learn how
Myth: All gluten-free foods are automatically better for PCOS
Truth: Gluten-free does not equal low-glycemic. Many gluten-free products use high-starch flours that spike blood sugar worse than wheat. Evaluate the complete nutritional profile, not just the gluten-free label.
Gluten-free breads can be higher glycemic than wheat. Check carbs, protein, and fiber, not just the label. What matters
Myth: Cheese is always bad for PCOS and causes inflammation
Truth: Cheese provides high-quality protein, calcium, and healthy fats that support hormone production. Individual responses vary, but many women tolerate aged cheeses well. Blanket elimination is unnecessary.
Cheese is not universally inflammatory for PCOS. Many women benefit from its protein and calcium. Individual responses
Myth: Brazilian food is too carb-heavy for PCOS management
Truth: Brazilian cuisine can be adapted for PCOS through ingredient modifications while maintaining authentic flavors. Cultural foods and health management can coexist through thoughtful recipe development.
Brazilian cuisine adapts beautifully for PCOS with strategic modifications that honor tradition. See how
Myth: Pão de queijo is just empty calories with no nutritional value
Truth: Traditional pão de queijo provides protein from eggs and cheese plus calcium. This PCOS-friendly version adds fiber, magnesium, vitamin E, and healthy fats, making it genuinely nutritious.
PCOS-friendly pão de queijo delivers protein, calcium, fiber, and more beyond just calories. Nutritional benefits
Myth: You should never snack when managing PCOS
Truth: Strategic snacks with balanced protein, fat, and moderate carbs prevent blood sugar crashes and overeating at meals. Protein-rich snacks like pão de queijo support stable insulin better than prolonged fasting.
Balanced snacks support blood sugar stability in PCOS better than extreme meal spacing. Smart snacking
Complete Benefits of This PCOS-Friendly Pão de Queijo
Metabolic Benefits
- Reduced glycemic load: 25-40% less carbohydrates than traditional versions
- Improved insulin response: Protein and fat slow carbohydrate absorption
- Enhanced satiety: Keeps you full for 2-3 hours despite small size
- Stable energy: Prevents blood sugar crashes and cravings
- Better weight management: Controlled portions with superior satisfaction
Hormonal Benefits
- Hormone building blocks: Healthy fats support steroid hormone synthesis
- Reduced androgen excess: Better insulin control decreases ovarian testosterone
- Bone health support: Calcium and vitamin D reduce fracture risk
- Gut microbiome benefits: Probiotics from aged cheese support hormone metabolism
- Reduced inflammation: Balanced fats and nutrients lower inflammatory markers
Nutritional Benefits
- High-quality protein: Complete amino acids from eggs and cheese
- Rich in calcium: 20% of daily needs supports metabolic health
- Vitamin E content: Antioxidant from almond flour reduces oxidative stress
- Magnesium source: Supports insulin sensitivity and stress management
- Added fiber: From coconut and almond flour slows digestion
Practical Benefits
- Quick preparation: Only 15 minutes hands-on time
- Batch-friendly: Freeze unbaked for instant fresh cheese bread anytime
- Portable snack: Perfect for work, travel, or busy schedules
- Versatile timing: Works for breakfast, snacks, or meal accompaniment
- Naturally gluten-free: Suitable for celiac or gluten sensitivity
Cultural and Emotional Benefits
- Cultural continuity: Maintain connection to Brazilian heritage
- Food freedom: Enjoy beloved snacks without health consequences
- Social inclusion: Participate fully in Brazilian food culture
- Reduced deprivation: Avoid psychological stress of elimination
- Family connection: Share traditional foods with loved ones
Interactive Pão de Queijo Success Checklist
Use this checklist to ensure perfect PCOS-friendly pão de queijo every time.
Before You Start
- All ingredients measured and at room temperature
- Oven preheated to 375°F (190°C)
- Baking sheet lined with parchment paper
- Cheese finely grated and ready
During Preparation
- I heated milk and oil until bubbles formed
- I poured hot liquid over dry ingredients immediately
- I mixed vigorously to create thick paste
- I let mixture cool 2-3 minutes before adding egg
- I incorporated cheese thoroughly and evenly
- I let dough rest for 5 minutes
Shaping and Baking
- I oiled my hands before rolling dough
- I formed smooth 1.5-inch balls
- I spaced balls 2 inches apart
- I baked for 18-22 minutes until golden
- Pão de queijo puffed up during baking
Serving for PCOS Management
- I am eating appropriate portion (6 pieces)
- I am pairing with additional protein if needed
- I am eating as part of a balanced meal
- I am enjoying them warm for best texture
- I stored extras properly for future enjoyment
Troubleshooting: Dough too thin? Add more tapioca flour. Too thick? Add milk gradually. Didn't puff? Liquid wasn't hot enough when mixed. Too dense? Over-mixed after adding egg. Cheese bread flat? Oven not hot enough.
Your Next Steps to PCOS-Friendly Brazilian Cooking
This Week
1. Make pão de queijo: Set aside 35 minutes to try this recipe. Master the hot liquid technique for authentic texture.
2. Plan Brazilian meals: Pair cheese bread with Brazilian black beans, grilled meats, or eggs for balanced nutrition.
3. Stock ingredients: Keep tapioca flour, quality cheese, and other ingredients on hand for easy future batches.
This Month
4. Perfect your technique: Make this recipe 2-3 times to become comfortable with the process and dough consistency.
5. Batch and freeze: Make double batches and freeze unbaked dough balls for fresh cheese bread anytime.
6. Share with loved ones: Introduce family to this PCOS-friendly version so everyone can enjoy Brazilian snacks together.
Long-Term Success
7. Explore Brazilian cuisine: Use this as inspiration to adapt other Brazilian recipes for PCOS management.
8. Track your response: Notice how your body responds to this snack. Monitor energy, cravings, and satisfaction.
9. Consider meal planning support: PCOS Meal Planner is a personalized meal planning service that prioritizes well being by helping you eat better, feel better, and effectively manage PCOS symptoms in a friendly, trustworthy way.
Remember: Managing PCOS does not mean abandoning Brazilian food culture. With thoughtful modifications, you can honor your heritage while supporting your health. This pão de queijo proves both are possible.
Join Our PCOS Meal Planning Community
Share Your Pão de Queijo Experience
We would love to hear how this PCOS-friendly Brazilian cheese bread worked for you. Did they puff up beautifully? How did your blood sugar respond? What did you pair them with?
Share with the community:
- How did your first batch turn out?
- Did the hot liquid technique work well for you?
- How did you feel after eating compared to traditional versions?
- What Brazilian meals did you serve them with?
- Did this help you stay connected to Brazilian culture?
Connect and Learn
Join thousands of women managing PCOS through nutrition that honors cultural identity. Share recipes, tips, and support with others who understand the intersection of health and heritage.
Ready for more Brazilian and Latin American PCOS-friendly recipes? Get personalized meal plans that incorporate your cultural preferences while supporting hormone balance.
Your Brazilian heritage and your health both deserve celebration. Every recipe you adapt brings you closer to sustainable PCOS management that feels like home.
Why this PCOS-Friendly Pão de Queijo (Brazilian Cheese Bread) works for PCOS
At 15g of carbohydrates per serving, this PCOS-Friendly Pão de Queijo (Brazilian Cheese Bread) is on the lower-carb end, which suits women with PCOS who have confirmed insulin resistance or who notice strong post-meal energy crashes. Pair lower-carb meals like this with a generous portion of non-starchy vegetables to keep fibre intake up.
A PCOS-friendly snack like this PCOS-Friendly Pão de Queijo (Brazilian Cheese Bread) should include protein or fat, not carbohydrates alone. Carb-only snacks (fruit, crackers, granola bars) spike blood sugar then crash it within 60-90 minutes, leaving you hungrier and more reactive to whatever comes next.
At 320mg of sodium per serving, this PCOS-Friendly Pão de Queijo (Brazilian Cheese Bread) fits comfortably within the 1500-2300mg daily target most cardiology and PCOS guidance agrees on. Lower-sodium meals are useful for women with PCOS who also experience bloating or who are managing blood pressure alongside metabolic concerns.
You Have a Recipe. But Do You Have a Full Week?
One great recipe is a start. A complete PCOS meal plan is a system. Here is how to go from one meal to a full week of eating that supports your hormones.
Free. Personalized. No signup required to start.
Frequently Asked Questions
Yes, this PCOS-Friendly Pão de Queijo (Brazilian Cheese Bread) recipe is designed to be PCOS-friendly. At 180 calories per serving with 8g of protein, it supports balanced blood sugar and hormonal health. It also provides 2g of fiber, which helps with insulin sensitivity.
This recipe takes about 35 minutes total. Prep time is 15 minutes and cook time is 20 minutes. It makes 2 servings, so you can meal prep for multiple days.
Per serving: 180 calories, 8g protein (18%), 15g carbs, 10g fat. Plus 2g fiber. PCOS meal plans typically aim for 30% protein, 35% fat, 35% carbs to support insulin sensitivity.
Yes, this recipe works well as a PCOS-friendly Snack. At 180 calories, it fits within typical PCOS meal plan targets for Snack. Pair it with other PCOS-friendly foods throughout the day for balanced nutrition.
This recipe can be part of a structured PCOS meal plan. It makes 2 servings, making it great for meal prep. For a complete weekly plan tailored to your PCOS type, take our free 60-second quiz at pcosmealplanner.com/pcos-quiz to get a personalized 7-day meal plan.
Cook Another PCOS-Friendly Snack
Each recipe you add to your rotation makes PCOS management easier. Variety keeps you from getting bored and quitting.
Comments
Register or log in to add a comment