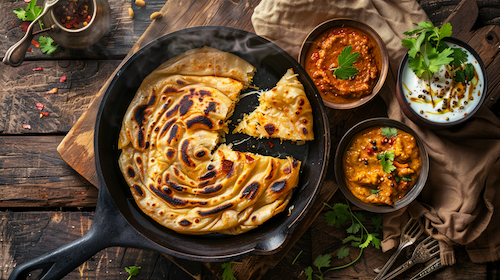
This PCOS-Friendly Parotta (Indian Layered Flatbread) is a PCOS-friendly recipe with 240 calories, 11g protein, and 20g carbs per serving. Ready in 45 minutes. High in fiber (8g), which supports insulin sensitivity.
Nutrition per Serving
Grocery List
- Almond flour (blanched, finely ground)
- Coconut flour
- Psyllium husk powder
- Baking powder (aluminum-free)
- Sea salt
- Eggs
- Plain Greek yogurt (full-fat)
- Ghee or coconut oil
- Apple cider vinegar
Glycemic Index Information
This PCOS-friendly parotta offers dramatically improved glycemic control compared to traditional wheat-based parotta. Traditional parotta made with all-purpose flour (maida) has a glycemic index of 70-80, causing rapid blood sugar spikes that worsen insulin resistance. Almond flour has a glycemic index near zero, and coconut flour has a low GI of 35-45. Combined with the protein from eggs and Greek yogurt and the healthy fats from ghee, this recipe creates a low-glycemic flatbread that produces minimal blood sugar elevation. With only 20 grams of net carbohydrates per serving compared to 50-60 grams in traditional parotta, this version significantly reduces insulin demand while providing 11 grams of protein to further stabilize blood sugar response. The high fiber content from psyllium husk, coconut flour, and almond flour slows digestion and supports sustained energy without crashes.
About Parotta Technique
Authentic parotta is known for its distinct flaky, layered texture created through a specific folding and coiling technique. While this low-carb version uses different flours than traditional parotta, the technique remains similar. The ghee between layers creates separation during cooking, producing the characteristic flakiness. The pleating and coiling may take practice, but even imperfectly shaped parottas taste delicious. Watch online videos of traditional parotta making to see the technique in action.
Storage and Reheating
Parotta is best enjoyed fresh and warm when the layers are most distinct and the texture is optimal. Store leftover parotta wrapped in foil or in an airtight container at room temperature for 1 day, or refrigerate for up to 3 days. To reheat, warm in a dry skillet over medium heat for 1-2 minutes per side, or wrap in damp paper towels and microwave for 30-40 seconds. The texture will be slightly denser after storage but still flavorful. For longer storage, freeze cooked parotta with parchment paper between pieces for up to 2 months. Thaw at room temperature before reheating.
Ingredients
Instructions
-
Step-by-Step Instructions
-
Prepare the dry ingredients: In a large mixing bowl, whisk together the almond flour, coconut flour, psyllium husk powder, baking powder, and sea salt until thoroughly combined with no lumps.
-
Mix the wet ingredients: In a separate bowl, whisk together the beaten eggs, Greek yogurt, 3 tablespoons melted ghee, warm water, and apple cider vinegar until smooth and well incorporated.
-
Form the dough: Pour the wet mixture into the dry ingredients. Mix with a spatula, then knead with your hands for 2-3 minutes until a soft, pliable dough forms. The dough should be smooth and slightly sticky but hold together well. If too dry, add water one tablespoon at a time. If too wet, add almond flour.
-
Rest the dough: Cover the bowl with a damp towel and let the dough rest for 10-15 minutes. This allows the psyllium husk and coconut flour to fully absorb the moisture, making the dough easier to work with.
-
Divide the dough: Divide the dough into 6 equal portions (about 2.5 ounces each). Roll each portion into a smooth ball between your palms.
-
Roll out the first layer: Place one dough ball between two sheets of parchment paper. Roll into a thin circle about 6-7 inches (15-18cm) in diameter. The thinner you roll it, the more authentic the texture, but be careful not to tear it.
-
Apply ghee for layers: Brush the rolled circle generously with melted ghee. This creates the signature flaky layers. Sprinkle a tiny pinch of almond flour over the ghee if desired.
-
Create pleats: Starting from one edge, fold the circle into pleats like an accordion or fan, creating a long strip about 1 inch wide. This pleating technique creates the layers.
-
Coil the strip: Take the pleated strip and coil it into a tight spiral, tucking the end underneath. Gently flatten with your palm. This is your prepared parotta.
-
Roll the coiled dough: Place the coiled dough between parchment paper again and gently roll into a circle about 5-6 inches (12-15cm) in diameter. Roll carefully to maintain the layers without completely flattening them.
-
Heat your pan: Heat a cast-iron skillet or non-stick pan over medium-high heat. Brush lightly with ghee.
-
Cook the first side: Carefully transfer the parotta to the hot pan (remove parchment). Cook for 2-3 minutes until golden brown spots appear and the edges look set.
-
Flip and cook: Flip the parotta and brush the top with a little ghee. Cook for another 2-3 minutes until golden brown spots appear on the second side. Press gently with a spatula to ensure even cooking.
-
Create flaky texture: Once cooked, transfer to a plate. Using two spatulas or your hands (when cool enough), gently clap or scrunch the parotta between your palms to separate the layers and create the characteristic flaky texture.
-
Keep warm and repeat: Wrap cooked parottas in a clean kitchen towel to keep warm while you cook the remaining ones. Serve immediately for best texture and flavor.
-
Pro Tip: The key to flaky parotta is generous ghee application between layers and gentle handling when creating the pleats. Do not skip the resting time, as it makes the dough much easier to roll thin without tearing.
Why This PCOS-Friendly Parotta Supports Hormone Balance
Parotta (also spelled paratha in some regions) is a beloved South Indian and Southeast Asian layered flatbread known for its flaky, crispy exterior and soft, chewy layers.
Traditional parotta is made with refined all-purpose flour (maida), copious amounts of ghee, and requires extensive kneading and resting to develop the gluten that creates its signature texture.
While delicious, conventional parotta poses significant challenges for women managing PCOS due to its high refined carbohydrate content and rapid impact on blood sugar.
This PCOS-friendly version reimagines parotta using almond flour and coconut flour to dramatically reduce the glycemic load while maintaining the layered, flaky texture that makes parotta so satisfying.
By incorporating protein from eggs and Greek yogurt, and using healthy fats from ghee, this recipe creates a flatbread that supports insulin sensitivity while honoring the authentic flavors and textures of Indian cuisine.
Key Nutritional Benefits for PCOS Management
Dramatically Reduced Glycemic Impact
Traditional parotta made with refined wheat flour contains 50-60 grams of rapidly-digesting carbohydrates per serving with minimal fiber or protein, causing severe blood sugar spikes.
This PCOS-friendly version contains only 20 grams of net carbohydrates, representing a 60-70% reduction in carbohydrate load. The combination of low-glycemic flours, high fiber content, substantial protein, and healthy fats creates a meal that produces minimal blood sugar elevation.
For women with insulin resistance, this difference is transformative, allowing enjoyment of a beloved flatbread without triggering the hormonal cascade that worsens PCOS symptoms.
High Protein Content for Metabolic Support
With 11 grams of protein per serving, this parotta provides nearly twice the protein of traditional versions. The protein comes from eggs and Greek yogurt, offering all essential amino acids needed for hormone production, tissue repair, and metabolic function.
Adequate protein improves insulin sensitivity, increases satiety hormones, supports lean muscle mass, and helps stabilize blood sugar for 3-4 hours after eating.
The protein-to-carbohydrate ratio in this recipe (nearly 1:2) is ideal for PCOS management, compared to traditional parotta which has a ratio closer to 1:10.
Exceptional Fiber Content for Blood Sugar and Gut Health
This recipe provides 8 grams of fiber per serving, primarily from psyllium husk, coconut flour, and almond flour. Traditional parotta made with refined flour contains less than 2 grams of fiber.
Fiber slows carbohydrate absorption, reducing blood sugar spikes and improving insulin sensitivity over time. Soluble fiber from psyllium specifically has been shown to improve glycemic control in women with PCOS.
Fiber also feeds beneficial gut bacteria, supports hormone metabolism through healthy elimination, and promotes satiety. The high fiber content makes this parotta far more filling than traditional versions despite fewer calories.
Healthy Fats for Hormone Production and Inflammation
The 14 grams of fat per serving come primarily from almond flour, ghee, and eggs. These fats are predominantly monounsaturated and saturated fats from whole food sources, which are essential for producing steroid hormones including estrogen, progesterone, and testosterone.
Ghee, a form of clarified butter, contains butyrate which supports gut health and reduces inflammation. The fat content also dramatically slows carbohydrate absorption, blunting blood sugar response.
Unlike the inflammatory partially hydrogenated oils sometimes used in restaurant parotta, the fats in this recipe support rather than harm metabolic health.
Rich in Magnesium for Insulin Sensitivity
Almond flour provides approximately 48mg of magnesium per serving, representing about 12% of daily needs. Magnesium is critically important for women with PCOS because it improves insulin sensitivity, supports glucose metabolism, and helps regulate blood pressure.
Studies show that women with PCOS often have inadequate magnesium intake, and increasing dietary magnesium improves insulin function and may reduce testosterone levels. Magnesium also supports stress management and sleep quality, both important for hormone balance.
Vitamin E and Antioxidants
Almond flour is rich in vitamin E, a powerful antioxidant that reduces oxidative stress. Women with PCOS experience higher oxidative stress due to insulin resistance and inflammation.
Vitamin E supports reproductive health, reduces inflammation, and may improve egg quality for women with PCOS who wish to conceive. The antioxidants in this recipe help combat the cellular damage that contributes to long-term PCOS complications.
Potential Concerns and Modifications
Calorie Density Requires Portion Awareness
At 240 calories per serving (3 parottas), this recipe is more calorie-dense than traditional parotta (180-200 calories) due to the fat content from almond flour and ghee. However, these are nutrient-dense calories that provide superior satiety and metabolic benefits.
The higher protein and fiber content means you will feel satisfied with fewer parottas compared to traditional versions. Still, for women focused on weight management, portion control matters. One serving (3 parottas) alongside protein and vegetables creates a complete meal.
Omega-6 to Omega-3 Ratio
Almonds contain primarily omega-6 fatty acids, which can be pro-inflammatory when consumed in excess relative to omega-3 fatty acids. While this recipe provides reasonable amounts, ensure you are balancing your overall diet with omega-3-rich foods like fatty fish, walnuts, flaxseeds, and chia seeds.
The eggs in this recipe provide some omega-3s, but aim for a dietary ratio of 4:1 or better omega-6 to omega-3 across all your meals.
Technique Learning Curve
Creating the layered, flaky texture of parotta requires practice with the pleating and coiling technique. Your first attempt may not look perfect, but the flavor will still be excellent. Low-carb doughs handle differently than wheat doughs because they lack gluten.
Be patient with yourself and expect improvement with each batch. Even imperfectly shaped parottas are delicious and nutritionally beneficial.
Not Suitable for Nut Allergies
This recipe relies heavily on almond flour and cannot easily be made nut-free while maintaining similar texture and nutritional profile. Sunflower seed flour can sometimes substitute for almond flour, though the flavor and texture differ.
For true nut allergies, this recipe is not appropriate, and alternative PCOS-friendly flatbreads using seeds or coconut flour alone would be safer options.
Digestive Adjustment Period
The high fiber content from psyllium husk and coconut flour may cause temporary digestive discomfort if you are not accustomed to high-fiber foods. Start with a smaller portion and ensure adequate water intake (at least 8-10 glasses daily) to help fiber move through your digestive system.
Most people adapt within a few days, and the digestive benefits become apparent.
How to Serve PCOS-Friendly Parotta
Parotta traditionally accompanies rich curries, dals, and vegetable dishes. Serve this PCOS-friendly version with chicken curry made with coconut milk, paneer tikka masala, egg curry, or vegetable korma.
The parotta is perfect for scooping up saucy dishes or tearing into pieces to enjoy with dry preparations.
For optimal blood sugar management, pair parotta with adequate protein (4-6 ounces) and plenty of non-starchy vegetables.
A complete PCOS-friendly Indian meal might include 3 parottas, a generous serving of chicken or paneer curry, raita (yogurt with cucumber), and a side of sautéed greens or roasted cauliflower. This combination provides balanced macronutrients that support stable blood sugar for hours.
Parotta also works beautifully as a wrap for grilled meats and vegetables, or torn into pieces and used to scoop hummus or baba ganoush for a fusion approach. The neutral flavor profile makes it versatile beyond traditional Indian cuisine.
Cultural Significance and Adaptation
Parotta holds special cultural significance in South Indian cuisine, particularly in Tamil Nadu and Kerala, where it is a street food staple and restaurant favorite. The rhythmic slapping sound of parotta being made on metal griddles is iconic in Indian food culture.
For many people of South Asian heritage, parotta evokes memories of family meals, celebrations, and cultural identity.
Adapting traditional foods like parotta for PCOS management honors both cultural heritage and health needs. This recipe demonstrates that managing PCOS does not require abandoning the foods that connect you to your culture and community.
Through thoughtful modification, you can enjoy authentic flavors and textures while supporting your metabolic health.
Research Methodology and Nutritional Science
This recipe is designed based on current research regarding PCOS management, insulin resistance, and low-glycemic eating patterns.
Evidence consistently shows that reducing refined carbohydrates while increasing protein, fiber, and healthy fats improves insulin sensitivity and hormonal outcomes in women with PCOS.
The National Institute of Diabetes and Digestive and Kidney Diseases provides comprehensive information on insulin resistance and evidence-based dietary interventions.
Information on PCOS nutrition and management comes from the National Institute of Child Health and Human Development, which conducts research on Polycystic Ovary Syndrome and effective management strategies.
Nutritional data is based on USDA FoodData Central and verified through multiple databases. Glycemic index information comes from published research on low-carbohydrate flours and their metabolic effects compared to refined wheat flour.
The Office of Dietary Supplements provides evidence-based information on magnesium, vitamin E, and other micronutrients found in almond flour and their roles in insulin sensitivity and reproductive health.
Frequently Asked Questions
Why is my PCOS-friendly parotta not as flaky as traditional parotta?
Traditional parotta achieves extreme flakiness through gluten development from wheat flour and extensive kneading and resting periods. Low-carb flours lack gluten, so the texture will be different though still delicious and layered.
To maximize flakiness in this version, ensure you apply generous ghee between layers, roll the dough as thin as possible without tearing, create tight pleats, and use the clapping technique after cooking to separate the layers. The psyllium husk provides binding that mimics some gluten properties.
Your technique will improve with practice. Even if less flaky than wheat versions, this parotta offers superior nutritional benefits for PCOS management and still delivers satisfying texture and authentic flavor.
Can I make this parotta without eggs for a vegetarian version?
This recipe is already vegetarian as it contains eggs but no meat.
However, if you want to make it vegan (egg-free), you can try substituting the 2 eggs with 2 flax eggs (2 tablespoons ground flaxseed mixed with 6 tablespoons water, let sit for 5 minutes) plus an additional tablespoon of psyllium husk powder to improve binding.
You may need to adjust the water content slightly. The texture will differ and may be slightly more dense, but the recipe should still work.
Keep in mind that eggs provide important protein that supports blood sugar stability in PCOS, so if removing eggs, ensure you are getting adequate protein from the curry or other dishes you serve with the parotta.
You could also increase the Greek yogurt to 0.5 cup (though this keeps it vegetarian, not vegan) to partially compensate for the lost protein.
How does this parotta compare to traditional parotta for weight management with PCOS?
While this PCOS-friendly parotta is slightly higher in calories than traditional parotta (240 vs 180-200 calories per serving), it provides dramatically better nutrition for weight management.
The 11 grams of protein versus 3-4 grams in traditional parotta creates much greater satiety, helping you feel full for longer and reducing overall calorie intake throughout the day. The 8 grams of fiber versus less than 2 grams further enhances fullness.
The low glycemic impact prevents insulin spikes that promote fat storage, particularly abdominal fat. Most importantly, stable blood sugar prevents the cravings and energy crashes that lead to overeating.
Many women find they need fewer pieces of this parotta to feel satisfied compared to traditional versions.
When accompanied by protein and vegetables as part of a balanced meal, this parotta supports healthy weight management better than refined flour versions despite similar or slightly higher calories.
Can I reduce the ghee in this recipe to lower the fat and calories?
While you can reduce the ghee somewhat, it serves important functions beyond flavor. The ghee in the dough (3 tablespoons) provides moisture and richness that compensates for the lack of gluten. The ghee used for layering creates the separation between layers that makes parotta flaky.
Reducing ghee significantly will result in drier, less flaky bread that more closely resembles a thick pancake. Additionally, the fat from ghee plays a crucial metabolic role by slowing carbohydrate absorption and preventing blood sugar spikes.
For PCOS management, the fat is beneficial, not problematic. The calories from healthy fats with adequate protein create better satiety than lower-calorie, higher-carb alternatives.
If you wish to reduce fat for calorie reasons, consider eating a smaller portion (2 parottas instead of 3) while maintaining the recipe as written, rather than reducing the ghee which compromises texture and blood sugar benefits.
Will this parotta work with different curry styles and spice levels?
Absolutely. This PCOS-friendly parotta has a neutral flavor that pairs beautifully with any curry from mild kormas to fiery vindaloos. The slightly nutty undertone from almond flour complements both North Indian and South Indian preparations.
It works equally well with creamy coconut-based curries, tomato-based gravies, dry spice-roasted vegetables, and protein preparations. The parotta can also bridge cuisines, pairing nicely with Middle Eastern stews, Mediterranean grilled meats, or even as a vessel for eggs at breakfast.
The texture holds up well to scooping thick gravies and remains sturdy enough not to fall apart. Some people add spices directly to the dough such as ajwain (carom seeds), cumin, or black pepper for additional flavor that complements specific curries.
Feel free to customize the spicing to match your meal while keeping the base technique the same.
Myths and Misconceptions About Indian Bread and PCOS
Myth: All Indian flatbreads are too high in carbs for PCOS management
Truth: Traditional wheat-based flatbreads do pose challenges, but modified versions using almond and coconut flour can fit into PCOS-friendly eating plans while maintaining authentic flavors and cultural connections.
Indian flatbreads can be PCOS-friendly when made with low-glycemic flours and strategic modifications. See how
Myth: Ghee is unhealthy and should be avoided with PCOS
Truth: Ghee provides beneficial fats including butyrate that supports gut health and reduces inflammation. Moderate ghee consumption does not worsen PCOS and provides building blocks for hormone production.
Ghee is not the enemy for PCOS. This traditional fat supports gut health and hormone production. Learn why
Myth: You need wheat gluten to make proper layered flatbread
Truth: While gluten creates distinct texture, low-carb flours with proper technique and adequate fat can produce satisfyingly layered flatbread with excellent flavor and better blood sugar impact.
Gluten-free parotta is possible with the right technique and delivers better metabolic benefits for PCOS. Get the recipe
Myth: Low-carb versions of traditional foods never taste authentic
Truth: Thoughtful recipe development using appropriate substitutes can create versions that honor authentic flavors while supporting health goals. Taste and texture may differ slightly but remain highly satisfying.
PCOS-friendly Indian recipes can taste authentic and delicious while supporting blood sugar balance. Try it yourself
Myth: Managing PCOS requires abandoning your cultural cuisine
Truth: Cultural foods can be modified to better support PCOS while maintaining the flavors, textures, and social experiences that make them meaningful. Health and heritage can coexist.
PCOS management and cultural food traditions are not mutually exclusive. Modification makes both possible. Explore options
Myth: Restaurant Indian food is always unhealthy for PCOS
Truth: Many Indian restaurant dishes feature protein, vegetables, and beneficial spices. Choose grilled meats, vegetable curries, and dal while limiting naan and rice. Making your own flatbread like this parotta allows better control.
Strategic choices at Indian restaurants plus homemade PCOS-friendly breads create sustainable solutions. Tips here
Complete Benefits of This PCOS-Friendly Parotta
Metabolic Benefits
- Minimal blood sugar impact: Low-glycemic flours prevent insulin spikes that worsen PCOS
- Improved insulin sensitivity: High fiber and protein support better glucose metabolism
- Sustained energy: Balanced macronutrients prevent crashes and support stable mood
- Reduced cravings: High protein and fiber increase satiety hormones
- Better body composition: Supports lean muscle while enabling fat loss
Hormonal Benefits
- Hormone building blocks: Healthy fats provide raw materials for steroid hormone synthesis
- Lower androgen production: Improved insulin function reduces ovarian testosterone
- Reduced inflammation: Anti-inflammatory fats and antioxidants support hormone balance
- Better stress response: Magnesium supports cortisol management
- Enhanced gut health: Fiber and butyrate from ghee support microbiome diversity
Nutritional Benefits
- Complete protein: Eggs provide all essential amino acids for tissue repair
- High magnesium: Supports insulin sensitivity and reproductive health
- Vitamin E rich: Powerful antioxidant that reduces oxidative stress
- Exceptional fiber: Supports digestion, hormone metabolism, and satiety
- B vitamins: Support energy production and hormone breakdown
Practical Benefits
- Authentic flavor: Maintains traditional taste despite different ingredients
- Versatile pairing: Works with any curry, dal, or protein preparation
- Batch-friendly: Make ahead and freeze for convenient future meals
- Family-friendly: Delicious for everyone, not just those managing PCOS
- Naturally gluten-free: Suitable for those with celiac or gluten sensitivity
Cultural and Emotional Benefits
- Cultural continuity: Maintain connection to South Asian heritage
- Social inclusion: Participate fully in cultural meals and celebrations
- Food freedom: Enjoy beloved dishes without health consequences
- Reduced restriction: Avoid feeling deprived while managing health
- Empowerment: Take control through informed food choices
Interactive Parotta Success Checklist
Use this checklist to ensure successful PCOS-friendly parotta with optimal texture and health benefits.
Before You Start
- I have all ingredients measured and ready
- I am using finely ground blanched almond flour (not almond meal)
- I have parchment paper for rolling without sticking
- My eggs and yogurt are at room temperature
- I have watched a video of traditional parotta technique
During Preparation
- I mixed dry ingredients thoroughly before adding wet
- I kneaded the dough for 2-3 minutes until smooth and pliable
- I let the dough rest for 10-15 minutes before rolling
- I rolled the dough thin (6-7 inches) without tearing
- I applied generous ghee before creating pleats
- I created tight accordion-style pleats
- I coiled the pleated strip tightly into a spiral
During Cooking
- I preheated my pan properly before cooking
- I cooked each side for 2-3 minutes until golden spots appeared
- I brushed with ghee during cooking for extra flavor
- I used the clapping technique to separate layers after cooking
- I kept finished parottas warm in a towel
Serving for PCOS Management
- I am eating appropriate portion (3 parottas or one serving)
- I am pairing with protein-rich curry or dal
- I am including plenty of vegetables in my meal
- I am staying hydrated with water
- I am eating mindfully and enjoying the flavors
After Eating
- I stored leftover parotta properly
- I noticed my energy level 1-2 hours later
- I compared this to traditional parotta experiences
- I feel satisfied without blood sugar crashes
Troubleshooting: Dough too dry? Add water gradually. Dough too sticky? Add almond flour. Parotta not flaky? Apply more ghee between layers and ensure thin rolling. Parotta breaking? Roll less thin initially and improve technique over time.
Your Next Steps to PCOS-Friendly Indian Cooking
This Week
1. Make parotta: Set aside 45 minutes to try this recipe. Watch online videos of traditional parotta technique first.
2. Plan a complete Indian meal: Pair parotta with a protein curry and vegetable side. Notice how you feel compared to restaurant Indian food.
3. Stock ingredients: Purchase almond flour, coconut flour, and psyllium husk for future batches. These ingredients keep for months.
This Month
4. Perfect your technique: Make parotta multiple times to improve your pleating and coiling skills. Technique improves dramatically with practice.
5. Batch cook and freeze: Make a double batch and freeze for quick future meals. Having PCOS-friendly flatbread on hand makes healthy eating convenient.
6. Try variations: Add spices like cumin or ajwain to the dough for different flavor profiles that complement specific curries.
Long-Term Success
7. Build your recipe collection: Use this parotta as inspiration to modify other Indian breads like roti, naan, or dosa for PCOS management.
8. Share with family: Introduce loved ones to this version so everyone can enjoy meals together without you feeling restricted.
9. Explore personalized meal planning: PCOS Meal Planner is a personalized meal planning service that prioritizes well being by helping you eat better, feel better, and effectively manage PCOS symptoms in a friendly, trustworthy way.
Remember: Mastering PCOS-friendly versions of beloved cultural foods takes practice but delivers enormous benefits. Every batch teaches you more about working with low-carb flours while honoring your heritage.
Join Our PCOS Meal Planning Community
Share Your Parotta Journey
We would love to hear how this PCOS-friendly parotta recipe worked for you. Did the layers turn out flaky? How did your blood sugar respond compared to traditional parotta? What curry did you pair it with?
Share with the community:
- How did your first attempt turn out?
- What challenges did you face with the technique?
- How did you feel after eating compared to traditional versions?
- What improvements have you noticed with practice?
- Did this help you stay connected to your cultural heritage?
Connect and Learn
Join thousands of women managing PCOS through nutrition that honors cultural identity. Share recipes, exchange tips about traditional food modifications, and find support from others navigating health and heritage.
Ready for more South Asian PCOS-friendly recipes? Get personalized meal plans that incorporate your cultural preferences while supporting hormone balance and insulin sensitivity.
Your culture and your health both deserve honor. With recipes like this PCOS-friendly parotta, you never have to choose between the two.
Why this PCOS-Friendly Parotta (Indian Layered Flatbread) works for PCOS
The 20g of carbohydrates here come paired with 8g of fibre, which slows glucose absorption and produces a flatter post-meal blood sugar curve. Fibre is one of the most under-rated tools for PCOS: it feeds gut bacteria that produce short-chain fatty acids linked to improved insulin sensitivity, and it modestly lowers circulating androgens by binding bile acids in the gut.
Evening meals affect overnight insulin and morning blood sugar more than most women realise. Keeping dinner protein-forward and finishing eating at least 2-3 hours before bed gives your body time to clear glucose before the overnight fast, which improves morning fasting insulin readings.
At 310mg of sodium per serving, this PCOS-Friendly Parotta (Indian Layered Flatbread) fits comfortably within the 1500-2300mg daily target most cardiology and PCOS guidance agrees on. Lower-sodium meals are useful for women with PCOS who also experience bloating or who are managing blood pressure alongside metabolic concerns.
You Have a Recipe. But Do You Have a Full Week?
One great recipe is a start. A complete PCOS meal plan is a system. Here is how to go from one meal to a full week of eating that supports your hormones.
Free. Personalized. No signup required to start.
Frequently Asked Questions
Yes, this PCOS-Friendly Parotta (Indian Layered Flatbread) recipe is designed to be PCOS-friendly. At 240 calories per serving with 11g of protein, it supports balanced blood sugar and hormonal health. It also provides 8g of fiber, which helps with insulin sensitivity.
This recipe takes about 45 minutes total. Prep time is 25 minutes and cook time is 20 minutes. It makes 2 servings, so you can meal prep for multiple days.
Per serving: 240 calories, 11g protein (18%), 20g carbs, 14g fat. Plus 8g fiber. PCOS meal plans typically aim for 30% protein, 35% fat, 35% carbs to support insulin sensitivity.
Yes, this recipe works well as a PCOS-friendly Dinner. At 240 calories, it fits within typical PCOS meal plan targets for Dinner. Pair it with other PCOS-friendly foods throughout the day for balanced nutrition.
This recipe can be part of a structured PCOS meal plan. It makes 2 servings, making it great for meal prep. For a complete weekly plan tailored to your PCOS type, take our free 60-second quiz at pcosmealplanner.com/pcos-quiz to get a personalized 7-day meal plan.
Cook Another PCOS-Friendly Dinner
Each recipe you add to your rotation makes PCOS management easier. Variety keeps you from getting bored and quitting.
Comments
Register or log in to add a comment